This tutorial shows how to use ICanLocalize’s Software Localization projects. We will upload the resource file and receive translated resource files for other languages.
When you upload your resource file, our system will extract the texts for translation. We will translate it and you will get back the translated resource files, ready to upload into your application.
Step 1) Setting Up a New Project
Go to Translation Projects and create a new Software localization project.
Name the project, tell us a bit about it and choose which language you are translating from. If you like, you can also specify important keywords that we should not translate (like your product name).
Next, you choose which languages to translate to and upload the resource files.
When you upload a resource file, you choose its format. Our system can handle many resource file formats, using different character encoding and structures.
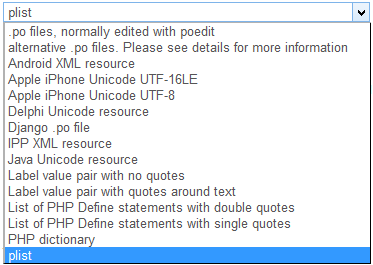
After choosing the format, select the resource file and upload it. Our system will extract the text from the resource file and you will see a summary screen with the strings uploaded. Review the extraction results and make sure that the text strings you see on the screen are correct. You will also be able to individually uncheck the strings you don’t want to translate. Look for ‘garbage’ characters, missing delimiters and other technical problems. If you find such problems, most likely you have chosen the wrong format. In this case, cancel the upload, choose the correct format and upload again.
Step 2) Choosing translators
Professional translators will apply for the job. You can view their profiles, interview them and choose the translators that you like best.
Applications
If you already have completed other projects with ICanLocalize and you have built a strong long-term relationship with your translators, you can automatically assign them to your project with just one click.
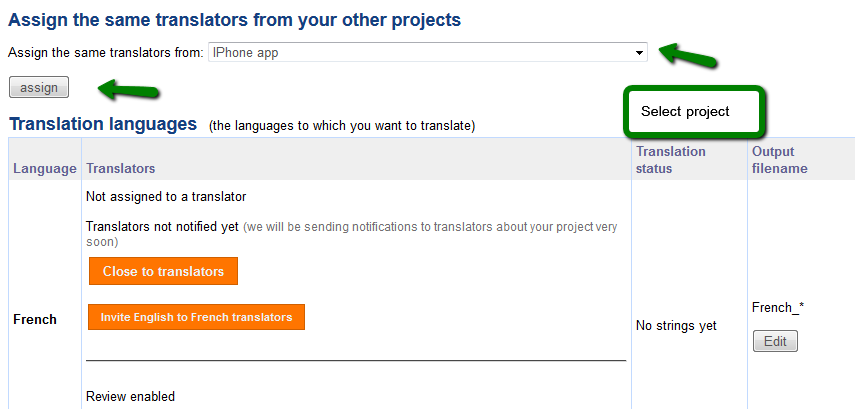
Choosing project and assigning
Step 3) Begin translation
After you have chosen translators and uploaded your resource file, it’s time to let translators work on it. Next to each language, you will see a checkbox per language ‘Ready to start translation (with review)’. You need to check the boxes of the languages you want to send to translation.
Selecting Languages for Translation
To finish, click on the button at the top or bottom ‘Begin marked translations’. This way you’ll be able to send untranslated texts to translation with just one click.
If there are enough funds in your ICanLocalize account, translations will begin immediately. Otherwise, you will be asked to deposit additional funds.
Step 4) Getting Completed Translations
You will be notified by email when translations are complete.
Go again to the project page. Next to the resource file you uploaded, you will see a button for generating the translations. Just click on it.
The system will generate translated resource files with the exact same format and structure as the file you uploaded. Only the texts are translated, leaving all field tokens intact.
Schedule
Delivery deadlines for this kind of projects are arranged between clients and translators. Since this work is usually ongoing, with a first, initial version followed by updates, completion deadlines may be flexible.
The system automatically calculates delivery deadline according to this formula:
DEADLINE (in days) = word_to_translate / 300 + 3
This means that translators are expected to translate 300 words per day and are allowed an extra 3 days.
When Your Application Updates
If you need to update your app, your translations can also be easily updated.
Just upload the new version of the resource file (older versions are also kept) and the system will automatically detect only the new or updated strings and will mark them as ‘need translation’. Send again to translation and our translators will do the rest.