Thanks to the integration of ICanLocalize and WPML, translating WordPress sites has become an easy task. All you need to do is configure WPML, activate ICanLocalize and send the content for translation. If you need help to download, install and configure the plugins, WPML offers comprehensive documentation, including an installation guide and a first configuration guide.
You can check out our video tutorial and follow the steps below to translate your website.
Create your website translation project
To translate your site in ICanLocalize, you just need to follow a simple wizard directly in WPML. This wizard will create a new translation project in ICanLocalize that will include separate jobs for each content sent for translation.
To create a new website project, please follow these steps:
- Go to the WPML -> Translation Management page and click the Translation services tab.
- Activate ICanLocalize from the list of services.
- Click on the Authenticate button and then on the ICanLocalize “Sign up” link.
- Fill in the form with the name and email address associated with your ICanLocalize account.
- The registration wizard will provide you with an API token. Copy the API token.
- Go back to the Translation services tab on the WPML -> Translation Management page and return to the ICanLocalize authentication wizard.
- Paste the API token and click Submit.
- Now your site is connected to WPML and ready to be translated.
Note: The registration wizard and options might depend on the WPML version installed. If you cannot follow the steps above, you can find your API token in the profile page after logging in to your ICanLocalize account.
Send content for translation
Once the registration is complete, you are ready to start.
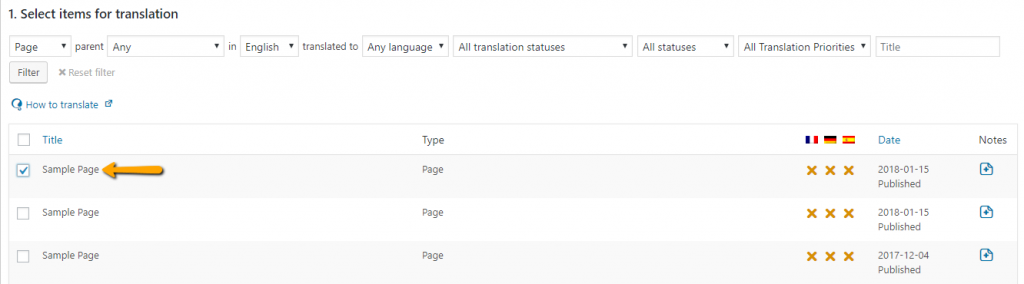
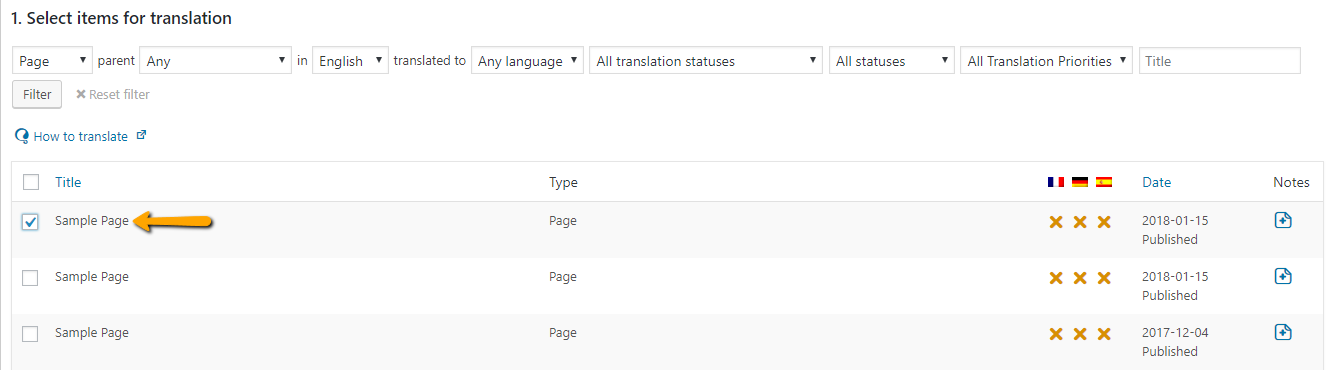
To help you select the content you want to translate, WPML provides you with a series of filters.

Follow this procedure to select your content and send it for translation:
- Select the checkboxes of the items you want to translate.
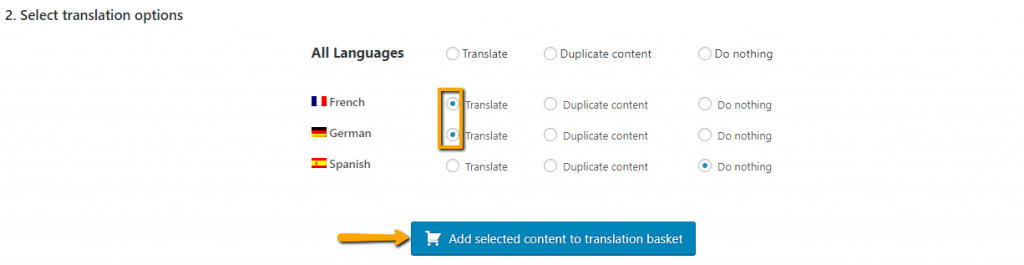
- Scroll down to the Translation options section, then choose the Translate option for the desired language.
- Click the Add selected content to Translation Basket button.
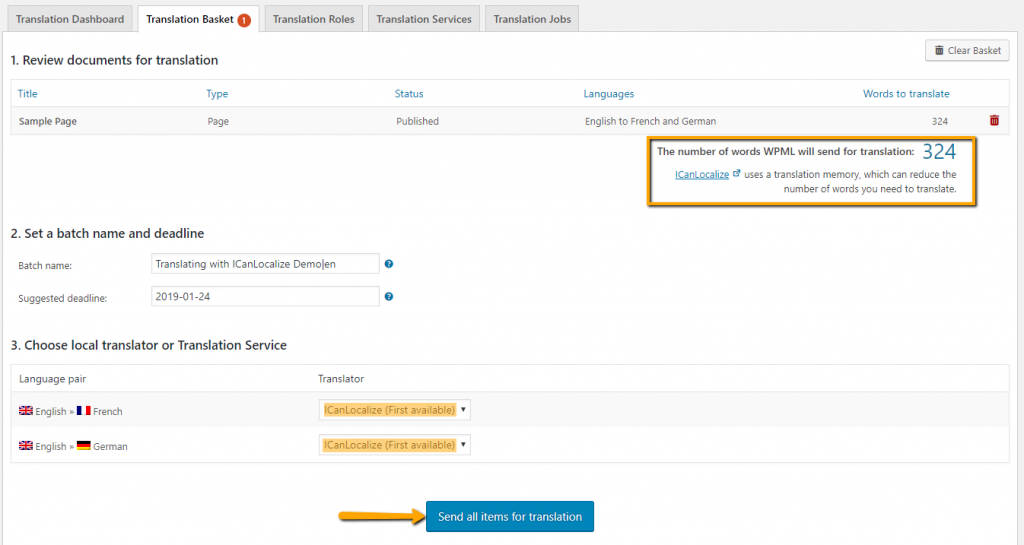
- Click on the blinking Translation Basket tab.

- In the Translation Basket, make sure to select ICanLocalize Translation Service in the Translate by drop-down menu.
- Click on the Send all items for translation button.


If you need to send strings for translation (theme, plugins and widgets elements), you will need to install and activate the WPML String Translation module. You can find and select the strings to send to the Translation Basket on the WPML -> String Translations page.
Review the documents sent for translation
After sending the content for translation, you can click on the “Continue to ICanLocalize” button to be redirected to ICanLocalize and see a summary of the jobs sent.
For each language pair, you can decide if you want to choose your translators or let us assign them automatically:
- Automatic assignment with fixed rates: this is the default mode which will assign translators automatically and you will get a fixed rate per word.
- Manual assignment with bidding process: to enable this feature, over the translator icon and disable the automatic assignment. You can browse the translators’ profiles, invite them to the project and check their rates, and then assign the ones you prefer.
Pay and start the translations
If you decide to have translators automatically assigned, you can proceed directly with the deposit and we will assign the translators for you.
If you select the translators manually, you will be asked for a deposit only after you select your translators.
In either case, the translators will start working as soon as there are funds in your account balance and you confirm the translations can start by clicking the Pay and begin translation. If your account already has funds, you just need to click the Start translation button.
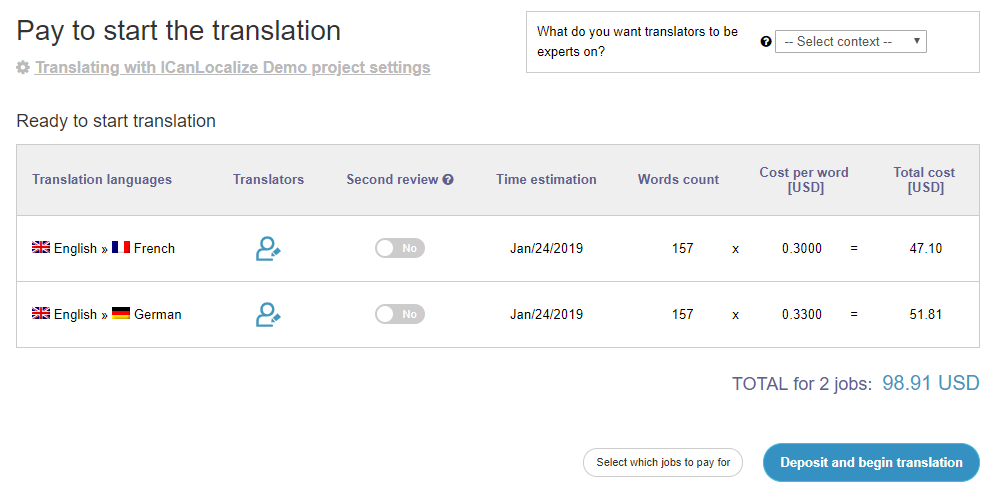
Each time you send us content for translation, you will need to go to the “Pay to start translation” page in your ICanLocalize account. You have the option to pay for specific documents or all of them. Click the button to confirm the payment and the translators will start working.
Note: The translations won’t start until the button has been clicked, regardless of the available balance. If you have recurrent translations, don’t hesitate to contact our support staff to help you make this process smoother.
Receive the completed translations
Once translations are complete, you will receive the translated content directly on your website. You need to select if you want to download the translations automatically or manually.
If you prefer to have the translations downloaded automatically, please go to the WPML -> Settings –>Multilingual Content Setup. Then, scroll to the Translation Pickup Mode section and make sure you select the “Translation Service will deliver translations automatically using XML-RPC” option.
Regardless of the option selected, you can always click the Check status and get translations in WPML Translation Management Dashboard to download the translations manually.
